|
Halloween Art Ideas
Spider Web
Materials Needed:
Black Construction Paper
White Paint
Scissors
Round, Metal Cake Pan or Pie Pan
Marble
Procedure:
Cut a piece of construction paper to fit into the bottom of the cake pan.
Place about a half teaspoon of white paint in the middle of the paper.
Drop the marble into the cake pan and tilt the pan back and forth. As
the
marble passes through the paint it leaves trails of white on the paper.
(You can also have the kids glue plastic spiders on their pictures when they are dry!)
Pipe Cleaner Spiders
Show children how to
twist pipe cleaners together to form a spiders
body and legs.
Encourage them to create their own pipe cleaner spiders.
Handprint Spiders
Trace around each
child's hands onto black construction paper. You may want to
use a white
crayon to make the outline more noticeable. Then
have the child cut out their handprints;
cutting off the thumb.
Then glue the hand cutouts together with palms together -
fingers
sticking outward. Glue on wiggly eyes in center and viola...
a handprint spider!
~ OR ~
You can use black paint instead of construction paper! As
seen below.
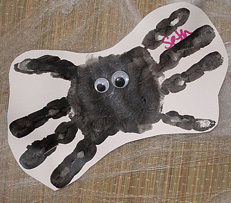
(Photo submitted by Nanette)
Masks
Set out the following items:
Yarn, Paper plates, felt-tip markers, and any other accessories
needed, to make
masks interesting, can be placed on a table in the art area. If desired,
yarn can be used as hair on the masks.
Fingerprint Spiders
Have the children make fingerprints
on a piece of paper using black washable tempera paint. When the
paint dries, have the children draw on eight squiggly lines for
legs on their fingerprints to represent spiders.
Scary Spider
Draw
around your child's hand on a piece of black construction paper.
Cut out the handprint.
Make eyes either by cutting small circles from white construction paper or
using paper
reinforcer rings. Glue the eyes to the palm of the handprint (with fingers
pointing down,
the top of the palm will become the head). Create a spider web by drawing
with
white chalk on a piece of orange construction paper.
Glue the spider to the web with the fingers pointing down.
Black & Orange Painting
Provide
black and orange paint at the paint easels.
OR
Let the children finger
paint using black and orange paint.
Halloween Finger Painting
Provide red and yellow paint for the children to mix
with their fingers onto a
pumpkin cutout shape.
Batty Bottles
Little ones will go batty over these Halloween water globes. To make one,
fill a small, clear plastic bottle with water. Squeeze in one drop of liquid
detergent and enough red and yellow food coloring to tint the water orange.
Add a generous pinch of bat- and moon-shaped confetti (found at party-supply
stores). Then hot-glue the cap onto the bottle. When the glue is dry,
a
youngster shakes the bottle to see the bats fly. Happy Halloween!
Foot Ghost
Trace child's foot out on
white paper turn it around and put
eyes and a circle mouth at he heel ... you have a GHOST.
~OR~
White tempera paint
footprints on black paper. Cut out, leaving a bit of black to
make an outline. Use the circle shaped notebook paper reinforcements for
eyes.
I Spy Pumpkin Pie
I spy pumpkin pie--and smell pie, too! These crafty pumpkin pies smell just
like the real thing. Fill a paper bowl with torn, orange tissue-paper
pieces.
Spray the pieces with cinnamon-scented air freshener. While the
pieces
are damp, sprinkle on pumpkin-pie spice. Trace the top of an empty
bowl onto a piece of orange paper; then cut out the circle. Punch holes
through the circle; then glue the circle onto the rim of the
"pumpkin-filled" bowl.
Halloween Ghost
Materials Needed:
1 pc. egg cups
markers
string or thread
white tempera paint
white tissue paper or crepe paper
glue
Directions:
Cut egg cartons into twelve single pieces. Poke a hole in the center
of each cup for string. Let the
children paint each egg cup. Do this early in
the day or the previous day. They must be allowed to dry.
the faces can
be drawn on with black marker or painted on with black tempera paint.
Tissue paper, crepe
paper, or white kleenex can be glued to the bottom
of each egg cup to give some flowing motion when
they are hung.
Hang the ghosts by stringing a knotted piece of string or thread through
a small hole in
the top of each cup. These can be hung
separately or hung in a ghostly mobile.
Cotton Ball Pumpkin Patch
Put cotton balls in a bag with powdered orange tempera paint and shake around.
Glue these cotton balls
onto paper with green yarn for a pumpkin patch.
(Variation: Orange pom poms can be substituted for the cotton.)
Pumpkin Pie
Cut out a pie shape. Give children shakers with cinnamon, ginger and nutmeg
in them. Children spread
glue over the paper pie shape and then shake spices on.
Pumpkin Pie Playdough
Ingredients Needed:
5 1/2 cups flour
2 cups salt
8 teaspoons cream of tartar
3/4 cup oil
1 container (1 1/12 ounces) pumpkin pie spice
Orange food coloring (2 parts yellow, 1 part red)
4 cups water
Directions:
Mix all of the ingredients together. Cook and stir over medium heat until all lumps
disappear. Knead the
dough on a floured surface until it is smooth.
Store in an airtight container. Place a batch of this dough in
your playdough
center. Add some fall cookie cutters, small pie tins (save from pot pies),
and rolling pins
to the area. (Invite your little ones to make fall cookies or
pumpkin pies. Remind them that these goodies only smell good. No
tasting please!)
Halloween Gourds
Take small softball size gourds. Cut out faces, cut small hole in the bottom
of the gourd, make sure to
clean out gourds, place yellow tissue paper
inside the gourds. Then you take small clear Christmas
lights, put each
bulb (or how may that you want) in each of the small holes in the bottom
of the gourds,
arrange in a small wooden shallow bowl or basket, arrange
corn, leaves, small pumpkins in bowl or
basket, plug in the lights.
Glowing Ghosts
Although the materials for this project are ordinary, the results are extraordinary.
To make a ghost, cut
through two thicknesses of waxed paper to make identical
ghost-shaped cutouts. Tint white glue by
adding a few drops of fluorescent paint
or food coloring. Spoon tinted glue onto one of the ghost cutouts.
Place black
construction paper cutouts on the glue to resemble a ghost's eyes and mouth.
Sprinkle the
glue with clear glitter, if desired, before aligning the remaining
ghost-shaped cutout and placing it on the
first. When the ghost has dried,
punch a hole in the top and suspend it from the ceiling with thread.
Pumpkin Book
Page 1 "Pumpkin, pumpkin big and round."
(fingerpaint a pumpkin, cut and glue on page with words)
Page 2
"I'm glad that you grow on the ground."
(cut
4 small pumpkins & add yarn vine on page w/ words)
Page 3 "I'm glad that you don't grow in a tree."
(trunk and fall leaves precut,
glue orange pumpkins w/ words)
Page 4 "'Cause then you might fall down on me."
(draw self with bump on head and pumpkin broken on the ground on page w/ words)
Jack-o-lantern Stamps
Use the cutouts from making a jack-o-lantern (eyes, nose, mouth) for pumpkin
prints just insert a
popsicle stick, dip them in paint, and use them as stamps.
You can docollages with the shapes, or have
the kids actually make the class'
jack-o-lantern face on a sheet of paper pre-cut in pumpkin shape.
Pumpkin Patch
Hard boil some eggs. Dye them orange (like you do with Easter eggs).
Cut paper towel tubes (not toilet paper
tubes) into smaller rings about one inch
in diameter. Decorate the rings with green paper or Easter grass.
Place the eggs on the decorated tubes.
Spider's Web
Materials Needed:
String or yarn,
6 6 in. pieces of string and 4 12 in. pieces of string,
diluted white glue or liquid starch,
dishes,
waxed paper
Directions:
Let the children dip pieces of string into dishes of glue or starch.
Then have them lay their strings on
waxed paper to create the spiders web.
Lay the string in the shape of a spiral overlapping the ends. Lay
the large
pieces of string over the spiral in the shape of a cross. When
the strings dry, they will become
stiff and hold their shapes.
Hanging Spider
Materials Needed:
paper plates
black construction paper, cut into long thin strips
scissors
glue
string
Directions:
Cut eight long strips of black paper and a circle for the spider's head.
Glue the two small paper plates
together, top to top, with the legs
and head placed between them. Paint the body black and glue a long
piece
of string to the middle of the back so the spider can dangle from the ceiling.
Spider Hats
Materials Needed:
Black and orange construction paper
glue
scissors
Directions:
Cut eight strips of black paper 1 1/2" x 9" 2. Cut one strip of black paper 2" x 22"
(you could substitute
two 11" pieces glued together). Cut the following:
Large black circles, medium orange circles, and small black circles.
Glue orange circle to edge of large black circle. Glue small black
circle to edge of orange circle. Measure the 22" piece around child's
head, overlap and glue ends together. Glue the eyes to the hat band
with
black eyes touching as shown. Fold the leg strips in half. Fold one
end of each leg strip back 1". Glue
the straight end to the inside edge of the
hat band. Fold and glue the remaining legs.
You will have four
legs on each side of your hat.
Fall Scarecrows
Place these cute little scarecrows on your porch to welcome all the trick-or-treaters!
Using a brown
grocery bag, cut off the bottom of the bag, then flatten the bag.
Fold in the corners, then staple. Stuff the
bag with newspaper, etc. and staple
the bottom closed. Turn the bag over and decorate with buttons,
markers,
crayons, construction paper, fabric scraps, and anything else you can think of.
Ghosts
Trace hands on white paper. Cut out hands and put a face on the ghost.
(FINGERS pointing down, wrist is top of
ghost). Cut a 1/4 a circle (or circle )
from yellow paper for the moon. Hold paper vertical. Decorate the
bottom of the
paper with a fence (brown), pumpkins. Take black construction paper and
glue moon up in
corner, fence on bottom and ghost up in the sky.
Playdough Fun
Let children assist you with making playdough. Add orange kool-aid powder
to dough. give children
Halloween cookie cutters to use with the
playdough.
Pipe Cleaner Spiders
Provide the children with pipe cleaners to make spiders. Have the children
twist the pipe cleaners together to form a body and legs.
Discuss how many legs a
spider has.
Balloon Jack-o'-Lanterns
Blow up an orange balloon and let the child use a black marker, stickers, or finger
paint to create facial
features. Ask the child how does the jack o lantern feel?
Paper Plate Jack-o'-Lanterns
Have your children paint a paper plate orange. When dry, have the child glue on
pieces of black
construction paper for the facial features. These pieces may be
cut with scissors or torn, depending on
your child's ability level. For older children,
try using glue to form the facial features and sprinkle glitter, or
various items
(i.e. buttons, beans, noodles, pebbles) on the glue.
Sponge Painted Ghosts
Cut out or buy ghost shaped sponges. You will need black construction
paper and white tempera paint
when showing the child how to dip the
sponges in the paint and press on the paper to make ghost prints.
Spider Paper Plates
Use a smaller and larger paper plate to make these spiders. Staple the
smaller plate onto the larger
plate, as if the smaller plate will be the
spider's head. Have the child paint both sides black. Then add
black streamers
for legs and white construction paper for eyes. Hang them from the ceiling.
Pumpkin Seed Art
Collect pumpkin seeds from inside a pumpkin. Let them air dry
and have the children use the pumpkin
seeds to make a collage.
Pumpkin Seed Shakers
You need: dried pumpkin seeds from inside your pumpkin, two paper
plates (for each child) and a stapler.
Have the children put some seeds
on one of the paper plates (bottom side down). Next, have them place
the other plate on
top of the first plate (bottom side up). Help the
children staple their plates together with the seeds inside. Let the
children
paint, use markers or crayons to decorate their shakers.
Fingerpainted Pumpkins
Give each of your children apiece of white butcher paper or construction paper.
In the center of each
piece of paper, place a spoonful of orange finger paint.
Let the children use their hands and fingers to
create designs with the paint.
When they have finished, allow their papers to dry. Then cut the papers
into pumpkin shapes and display them around the room.
Fingerprint Pumpkins
Have the children make orange fingerprints on a piece of paper.
Use a non-toxic orange ink pad. Show
the children how to use
one finger at a time. Use a green pen to draw stems on the paper
and draw vines
to connect some of the pumpkins. (You can do this for
younger children or have older children draw the vines and stems
themselves.)
Fingerprint Spiders
Have the children use a black non-toxic ink pad to make fingerprints on a piece of
paper. Have the
children draw on eight legs on their fingerprints to represent spiders.
Spider Web
Materials Needed:
Round Metal Cake Pan or Pie
Pan,
Black Construction Paper,
White Paint,
Scissors,
Marble.
Directions:
Cut a piece of construction paper to fit into the bottom of the
cake pan. Place one-half teaspoon of white paint in the middle of the paper.
Drop the marble into the cake pan and tilt the pan back and forth. As the
marble passes through the paint it leaves trails of white on the paper.
(I
have also had the kids glue plastic spiders on their pictures when dried!)
Spider Gum Drops
Supply the children with large black gum drops and eight toothpicks per child.
Have the children push the
toothpicks in the gum drops to represent the spiders legs.
Spider Webbing
Provide children with a chair and some yarn or string. Ask them to
create a spiders web by wrapping the
string around the legs of the chair.
Halloween Cookie Cutter Painting
Buy an assortment of Halloween cookie cutters. Let the children
dip the cookie cutters into paint and
then press onto paper.
Halloween Pasta Collage
Check out your local grocery store to find pasta in Halloween shapes. Let your
kids create a
cool collage with the pasta and whatever else you decide to add.
Paper
Chains
Cut orange and black construction paper into 1" by 5" strips.
Tape or paste one orange strip
into a ring. Thread a black strip through
the orange ring and paste or tape it closed. Continue
adding rings to
the chain, alternating the colors. When your chain is long enough,
drape it
across a doorway or window. Paste a Halloween picture
at each end of the chain where it is
attached
to the doorway or window.
You can also buy orange & black streamers at party
stores.
Popcorn Packaging Ghosts
Cut a piece of white heavy thread (such as fishing line) and tie it around
the popcorn about 1/3 of the way down to separate the neck from the body.
Pull
the string tight to scrunch in the popcorn. Then use a black marker
to make
eyes, mouth, and arms. String them onto a necklace.
Make a mobile or put on a
popsicle stick and make tiny puppets.
Boo Mask
A mask that a child can hold up to his face and remove when desired.
Eyes
look through the O's in BOO. Cut out of black paper.
Add popsicle stick handle
and colorful streamers on the side.
Paper Bag Pumpkin
Using a large grocery bag (or a little lunch bag) crumple
newspaper and stuff.
Twist top of paper bag and tie with elastic. Have children paint
the bag orange. Paint the face black. Paint stem green.
Finger Paint Pumpkin
Put blobs of red and blobs of yellow finger paint on pieces of shiny white
finger paint paper. If you do not have finger paint, you can use tempera
Add a
small amount of liquid starch to thicken and brighten the tempera.
Let the
children finger paint all over the paper, noting the different shades
of orange
made. Let the papers dry. Cut out the biggest pumpkin shapes
possible from the
painted papers. Encourage the children to
draw their own scary, happy, or silly
faces on them.
Use as suggested in the Bulletin Board Idea below to create a pumpkin patch
mural.
Pumpkin Patch Bulletin Board Idea
Make a class pumpkin patch mural. Have each child make a finger paint
pumpkin.
Trace a large, simple oval shaped leaf on green construction paper for
each child
and let the children cut out their own leaves. Mount the pumpkins on
your bulletin
board. Make the vines by twisting lengths of green crepe paper
streamers and
stapling them to the bulletin board. Staple the leaves on the
vines,
arching them for a three dimensional effect.
Seed Scenes
Dye pumpkin seeds in a mixture of one cup of water, one teaspoon of vinegar,
and
several drops of food coloring. Dry them overnight on a paper towel. Let the
children
glue the seeds on dark sheets of construction paper to make mosaic
collages.
Make-a-Face Pumpkins
Make a several large pumpkins from cardboard that has been
painted orange.
Give the children an assortment of geometric
paper shapes. Let them use them to
create a variety of jack-o’-lantern
faces on the pumpkins, different ones each
time they play!
Pumpkin Patch Picture
Materials
Needed:
Cotton Balls, Orange Paint Powder, Pie Pan,
Brown Construction Paper, Green
Yarn, Yarn.
Directions:
Put the paint powder in the pie pan. Roll the cotton balls
around in the paint and then set aside. Spread glue onto the brown
piece of
paper. Put on the orange cotton balls (pumpkins) and the
green yarn (vines).
Or you can also just use orange pompoms.
Witches Broom
Paper Grocery Bag, Paper Towel Rolls, Scissors, Tape, String. Depending on
the length you want the broom handle to be, you can tape two or more paper
towel rolls together. Cut off the bottom of the paper grocery bag, then cut
fringes into that side. Roll the uncut side of the paper bag around the
bottom of the tube; attach with tape, then tie with string.
Pumpkin Seed Pictures
Dye
pumpkin seeds many colors. Place the seeds with paste and
paper on a table in the art area. Have children create their own pictures.
Halloween Carriers
Use these cute carriers to to carry homework, treats, etc. Paint or color the
bottom of two paper plates
orange. Decorate the bottoms with a face. Staple
half the plates together leaving half of the plates open.
Cut a 6" x 2" green
strip of construction paper (can use regular paper and color green)
Rattling Skeletons
Use white paper to form 5 paper chains, and then connect to make a skeleton.
Trace children's hands
and feet on white paper, cut and glue to the ends
of the arms and legs. Cut an oval shape and draw on
the face.
These work best when made with small groups of children.
Tissue Ghosts
Supply each child with two pieces of tissue paper and a piece of string or yarn.
Have each child ball up
one of the tissues, then place it in the center of the
second tissue. Next, have the child, or assist the
child, in tying the yarn
around the second tissue to hold the balled tissue within the second tissue.
The
child may use a marker to make eyes.
Bean Ghost Pictures
Materials Needed:
Black Construction Paper
Large Lima Beans
Fine point Markers
Glue
Procedure:
Glue the beans onto the paper, and use a fine point
marker to
make a face on the bean. This is the ghost. If you want,
you can have the child draw a scene on the paper too!
Milk Jug Skeleton
Materials Needed:
8-9 clean plastic 1 gallon milk cartons
craft knife or heavy duty scissors
hot glue gun
hole punch
string
Head:
Choose a jug with a pair of circular indentations opposite the handle
and turn it upside down. In the
corner, opposite the handle,
use the craft knife or scissors (parents only) to cut out a
large, smiling
mouth, centered under the indented "eyes".
Make two small slits in the top of the head and tie a loop
of
string through them for hanging the finished skeleton.
Chest:
Cut a vertical slit down the center of a right-side-up jug, directly opposite the handle.
Cut and trim away
plastic to make the rib cage. Glue the head and chest together
at the "neck" by connecting the spouts of
the two jugs with a thick band of hot glue
(adults only). Hold the jugs together for a few minutes until the
glue cools.
Shoulders:
Cut off two jug handles (leaving a small collar on the ends) and attach them
to the chest section with hot
glue. Punch a hole at one end of each shoulder.
Hip:
Cut all the way around a jug, about 4.5 inches up from the bottom.
Take the bottom piece and trim away
a small smile shape from each
side to make a four-cornered piece. Punch holes in two opposite corners.
Waist:
Cut out two spouts, leaving a .5 inch collar on each. Glue the spouts
together and let dry. Then, hot glue
the waist to the bottom
of the chest and the top of the hip section.
Arms and Legs:
Cut eight long bone shapes from the corner sections of three jugs
(cut into the curved shape of the jug to
make the bones even more realistic).
From four of these, cut out the center to make forearms and shins.
Punch a hole through the ends of all eight bones. Tie two arm sections
to each shoulder, and two leg
sections to each hip with string.
Hands and Feet:
Let the kids trace their hands and feet onto the side of a jug, then cut out the
shapes. Punch holes in the
hands and feet and tie them onto the arms and legs.
Halloween Centerpiece
Take a block of Styrofoam (about 6 x 4 inches) and have the child paint it green.
This will be your base.
Then have them paint walnuts orange (this will be the
pumpkins) have them paint popsicle sticks white
(this will be the pickets in a fence).
Also, take a tootsie roll pop and cover it with a white tissue. Tie
around the base
of the ball of the lollipop to make it look like a ghost figure. Draw a face on the
rounded
end of the lollipop. Now assemble the parts. Stick the popsicle sticks
into the block of green styrofoam in
a row. Place the tootsie roll pop ghost
into the styrofoam and then glue on the orange walnuts. Purchase
small,
plastic black cats to stick into the styrofoam. You now have a little, holiday
centerpiece for each
child. The older the child, the more involved you can make it.
Jack-o-lanterns
Trace 2 hands on ORANGE paper and cut out. Trace around 2 hands on GREEN
paper and cut out. Cut
out faces (black ) and stem (green) for pumpkins. Glue
on BLUE paper - Put green hands, fingers
pointing up on bottom for bushes
and pumpkins above bushes with fingers pointing down.
STEM goes on
top of hand where wrist is.
Halloween Painted Rocks
Have the children hunt around outside for different shaped rocks.
Long, slender rocks for ghosts, oval
shapes for spiders,
and just about any stout rock will make a great pumpkin!
Pumpkin
stout, roundish rock
orange tempera paint
black marker
small amount of raffia
3-4 silk leaves
tacky or hot glue
3/4" piece of green chenille stick
bits of Kleenex tissue
The texture of the rock for the pumpkin can be smooth, bumpy, or even jagged,
as was in our case.
Before you begin, stand the rock up in the position you
would like it to be when your craft is complete.
Ours was a little tricky,
we just leveled him off using the raffia and tissue. Paint the rock
orange and let it
dry. Using a black marker, draw on pumpkin's face.
Glue silk leaves to the bottom of your pumpkin.
Using bits of
Kleenex for leveling and bunches of raffia, glue rock onto "straw bed".
Top off your pumpkin
rock with green chenille for the stem
by folding in half and gluing on top of pumpkin's head.
Ghost
long, slender rock
white tempura paint
black marker
handful of cotton batting
tacky or hot glue
white glitter glue
Paint rock white and let dry. Draw face onto ghost with black marker.
Glue cotton batting to the bottom of
the rock to give the appearance of a ghostly
trail following him. Smear white glitter glue down the sides of
the ghost.
Spider
oval rock
black tempura paint
pair of wiggle eyes
6-8 12"-long black chenille sticks
red glitter glue
small piece of paper plate or white paper
scissors
tacky or hot glue
Paint rock black and let dry. Wrap chenille sticks around body to secure legs
in place. Bend sticks to
form legs. Glue chenille sticks in place on the bottom
of the rock. Glue on two wiggle eyes. Cut little
fangs from paper plate or paper
and, using red glitter glue, glue onto rock-face, underneath wiggle eyes.
use red
glitter glue to create a few drops of blood on fangs and paint around mouth to finish up.
Note: Be sure to keep these cute crafts out of the reach of small children
under the age of 3 years. Wiggle eyes can be easily
removed and swallowed,
or worse yet, choked upon.
A Fistful of Ghosts
With a flick of the wrist, a hand print becomes a ghost! Make a paint pad
from a folded, wet paper towel
and white paint. Press the little finger side
of the hand onto the pad and then onto
background paper with a bit of a swish.
The little finger makes a head and the bottom of the hand creates
the ghost!
Ghost Magnet
Make a ghost cut out of black construction paper and place in an old
oatmeal canister with one teaspoon
white paint and marbles and
shake. Makes a really cute spooky ghost. Mount them on fun foam
and add
glitter and a magnet for a spooky refrigerator magnet.
Glue Ghosts
Have the child draw a ghost outline on a piece of waxed paper, and then have
them fill in the outline with
white school glue. Dry overnight, and then have the
child add facial features. Place on a string and you
have a spooky ghost necklace.
Cool Whip Lid/Grocery Sack Ghost
Materials Needed:
Cool Whip Lid or other similar sheer white lid
3 Black Construction Paper circles for eyes and mouth
2 sheer white plastic grocery sacks
2 white pipe cleaners (chenille stem)
Scotch tape
Glue stick
Black yarn
Hole punch
Directions:
Glue eyes and mouth on front of lid. Cut off any writing or graphics,
and handles from grocery sacks. Lay
the sacks on a flat surface.
With scissors, shred 2" strips up sacks leaving at least 1" area
in tact next
to the seam. Glue the pipe cleaner/chenille stem into
the seam. Turn lid over on flat surface. Bend and
insert the pipe
cleaner/seam into the ridge around the bottom 1/2 of the lid. Tape to
secure in place.
Repeat with the 2nd sack and stem, and insert in the
ridge around the upper 1/2 of the lid. Punch a hole
through top of the
lid. Thread a length of yarn through the hole appropriate for hanging.
The kids preferred
to have a loop on the end of a 1 1/2' length so
they could hold on and run with them. They "fly" nicely and
appear
as though the kids are being "chased" by a little ghost!
Handprint Ghosts
Let the children paint their hands white and make handprints on sheets
of
black construction paper. When they dry, have the children turn the
handprints
upside down and add details to create their own personal ghosts.
Children can
dip one finger in black paint (or press a finger
on a black
stamp pad) and make eyes and mouths for their ghosts.
Giggly Ghosts
Have the children tear off a wad of the quilt batting. Have the children
form the "ghost" any way they want.
Next, have the children cut eyes,
legs, arms, etc. from the construction paper
and glue onto their ghost.
Finally, cut some of the elastic and tape to the top of the ghosts and
hang
them from the ceiling. The kids love to watch them bob up and down.
Cheesecloth Ghosts
Dilute white glue with ½ to ¾ cups of water. Let the children dip a piece
of cheesecloth into the diluted
glue. Have the children drape the wet
cheesecloth over the 16 oz. cups. Let the "ghosts" dry for two
days.
Carefully remove the cup from the hardened cheesecloth. Let the
children decorate their ghosts.
Hang the completed ghosts from the ceiling.
Ghost Windsock
Draw thick straight lines every two inches along the short side of 12" x
18"
pieces of white construction paper. The lines should end about halfway
up
the paper. Let the children cut the strips to make "tatters" in the
ghost’s sheet.
Have them draw a face in the middle of the uncut part of the
paper. Staple the
edges of the paper together to form a windsock. Punch holes at
the top and run
yarn through them. Hang the ghost windsocks where they will
catch the wind.
Halloween Ghost
Materials Needed:
1 pc. egg cups
markers
string or thread
white tempera paint
white tissue paper or crepe paper
glue
Procedure:
Cut egg cartons into twelve single pieces. Poke a hole in the center of each
cup for string. Let the
children paint each egg cup. Do this early in the day
or the previous day. They must be allowed to
dry. The faces can be drawn
on with black marker or painted on with black tempera paint. Tissue paper,
crepe
paper, or white kleenex can be glued to the bottom of each egg cup
to give some flowing motion when
they are hung. Hang the ghosts by
stringing a knotted piece of string or thread through a small hole in
the top
of each cup. These can be hung separately or hung in a ghostly mobile.
Gg Is For Ghost
On black construction paper have the children paint white ghosts.
When the ghosts are dry, ask the
children to give their ghost a name
that begins with the letter G and tell a goofy story about their ghost.
George The Ghost
Cut a ghost shape out of green construction paper. Draw a goofy face
on the ghost. Then use green glue
to put green glasses on the ghost.
Write the letter "G" on the ghost. Use both upper and lower case
letters. You now have a "Goofy green ghost wearing green glasses."
Juice Can Monsters
Gather one clean frozen juice can per puppet. Construction paper or fabric for body,
Glue, felt or paper
strips for arms and legs, Buttons, feathers, fabric, glitter, paper,
and other assorted decorations. Cover
the juice can by gluing on construction
paper or fabric, then place the can upright on a table (with the
opening at the
bottom). Glue felt "arm" strips midway down both sides of the
can and
"leg" strips to the front of the lower edge. Set out the rest of your
decorations and watch as your
children create some interesting characters.
Monster Child
A great idea for monster madness is to get a paper bag (large enough to
fit over a child sized head) Cut
an oval shape around where their eyes
are (this shape makes it easier for them to
see) Collect recycled
material and let the children create their own monsters.
Ugfuzz
Use the front of the box, where it opens, as the mouth. To make the fur,
spread some glue over part of
the box. Firmly press a piece of dryer
lint into the glue. Keep gluing dryer lint onto the
sides and top of
the box until it is covered. Use construction paper to cut out eyes
and teeth for the
monster. Tape the eyes and teeth to the box.
Punch a hole near the center of the bottom of the box.
Push the
bendable end of the straw partway through the hole. Bend the straw
and tape it to the inside of
the top of the box. Push up on the straw
to make the Ugfuzz's mouth open. Instead of dryer lint you could
use
these ideas to dress your monster: cotton balls, pipe cleaners,
strips of ribbon, tissue paper, pompoms, fiberfill, and fabric strips.
Spooky Garbage Bag Cats
Materials Needed:
Black Plastic Garbage Bags
Newspaper
Rubber Bands
Black Electrical Tape
Orange Contact Paper or Orange Paint Marker
String
Animal Face Pattern
Directions:
Place a rubber band tightly around the each corner of a garbage bag,
about 6" from the end. Stuff the
garbage bag with several pieces of
newspaper. Rubber band off to form the head. Spread open the
banded off sections of the bag and tape down part of each to form
the ears. Cut the bottom of the bag up
to the rubber band every
3" to for streamers. Use Animal Face Pattern to paint on a face
with paint
markers or to cut a face out of contact paper and apply
to garbage bag. Poke a hole through the top of
the bag for
a string. Reinforce hole with black electrical tape.
Fabric Softener Sheet Ghosts
Ever wondered what to do with old fabric softener sheets?
Why not make a spooky little Ghost! And they
smell great too!
Don't have enough sheets? Use white tissue paper instead.
Materials Needed:
Three used fabric softener sheets
Some string or an elastic band
A black marker
Directions:
Crumple two of the sheets
into a ball. Put the other piece on the table,
spread out and flat The put the
ball of tissue paper in the center
of the flat peace. Pull up all the corners and squeeze the paper
just
under the ball (it should look like a ghost shape now). Tie the string
or elastic band (just under the ball). Add eyes and a mouth
with the marker.
Halloween Pasta Necklaces
Find Halloween shaped pasta. Let your children string the pasta
shapes on a piece of yarn to create a
necklace or bracelet.
Creepy Crawly Spider Bracelets
Materials Needed:
Black Construction Paper
Wiggly Eyes
White paper (for "fangs")
Paper Fastener
Stapler/staples
Scissors
White Crayon
Glue
Pencil
Directions:
Fold black construction paper in half. Along folded edge, lay child's hand
palm down (midway through palm)
and trace fingers with white crayon. Cut out
the outline of the fingers. Unfold and you have a complete
image of a spider with
eight legs. Now turn the spider over and with the pencil, roll the legs around the
pencil...this makes the legs curl under and gives a more creepy, crawly effect.
Cut a 1" strip of black
paper from the remaining scraps, and form it into a circle
for the bracelet part. At the appropriate length,
staple the ends together.
Attach the bracelet to the underside center of the spider using the paper
fastener. Glue on the wiggly eyes and the "fangs" that you design and cut from
the white paper to the
topside of the spider's head. The child puts his/her fingers
or wrist through the bracelet...the kids can
make their spiders creep and crawl
with a back & forth rocking motion of their wrists. The paper fastener
allows the spider to turn back and forth or 360 degrees, too!
Halloween Wreath
Materials Needed:
8" styrofoam wreath
2 2" strips of orange fabric 44" long
1 2" strip of black fabric 12" long
Metallic trim (optional)
1 yucky rubber spider
Craft glue
Do not worry about the type of fabric you are using. It is the color effect we are
after, anything that is
orange and black will work. Wool, felt, satin, cotton, etc.
Directions:
Wrap the orange strips around the wreath to cover the base entirely.
Glue ends down in the back. Do not
worry about raw edges showing.
Wrap metallic trim around the wreath in the same manner and bring
ends to the back and glue down. This step is optional but I think it gives
some extra "snap" to the end
result. Tie black strip in a bow and attach
at the top with glue. Tie black thread around the body of your
yucky spider
and hang down from the middle of the wreath. Glue the thread ends in
the back of the
wreath as well. Let the spider hang free. This is the spider's
web. It is so simple and the kids will have fun
hanging all sorts of yuckies from the
wreath. It also costs next to nothing if you use odd and ends from around
the house.
Pumpkin Yarn Bug
(Recommended for ages
6-12)
Materials Needed:
Orange Yarn
Craft Foam, Stiffened Felt, and/or Heavy Paper
Empty Egg Carton
Old 3½" Floppy Disk or Heavy Cardboard Cut to the Size of One
Tacky Glue
Scissors
Pumpkin Bug Faces
Pumpkin Bug Stems
Bug Feet
Directions:
Print Pumpkin Bug Faces, Pumpkin Bug Stems, Bug Feet. Many inkjet
printers will allow you to run
stiffened felt. This will work good for the feet,
face, and stem. If using craft foam, print it on regular paper
and staple it
onto foam and trim around outlines. You can also use heavy index paper.
Make a pompon
by wrapping yarn around floppy disk (or heavy cardboard)
as least 100 times. Mix the yarn colors any
way you would like. Cut a 6"
piece of yarn and slide it under wrapped yarn. Tie tightly into a double knot.
Turn floppy over and cut completely through yarn on this side. Turn yarn blob
sideways and smooth down
strands. Cut out 1 section of the egg carton.
Trim so it sits securely upside down. Use tacky glue to glue
the egg cup
upside down on the feet. Cover the top and some of the sides of the cup
with tacky glue.
Separate the strands of the pompon to fit the egg cup up inside.
Press pompon into place. Arrange yarn.
Attach face and stem to yarn bug.
Halloween Door Hangers
Hang one on your door at Halloween to let the
trick-or-treaters know if you are home.
Materials Needed:
White Pattern
Color Pattern
Black Foam Door Hanger
White, Yellow, Orange and Red
Craft Foam
Tacky Glue
White Paint Marker
Scissors
Directions:
Print white pattern and color pattern. Staple to craft foam and cut all pieces.
Glue pieces both sides of
foam door hangers using picture above as a guide.
Write "Gone Spookin" on one side and "Treat Stop"
on the other side.
Witch Hat
Cut out triangular shapes from black material to represent a witch hat.
Let the children decorate the hats
with glitter and foil.
Broom Art
Supply the children with a broom, a large piece of butcher paper and some paint.
Tape the paper on the
floor and add the paint. Have the children use the broom
to paint the paper. You may want to have the
children take off shoes
and socks, and
roll up long pants... this is REALLY MESSY!!!
Window Watchers
Materials Needed:
Construction Paper,
Crayons,
Scissors,
Glue,
Colored Tissue Paper (orange, red, or yellow)
Procedure:
Draw a Halloween character (bat, cat, pumpkin, ghost, etc.) on a piece of
construction paper (just make sure the eyes are at least an
inch around);
cut it out, including the eyes. Trace the cutout onto another piece of paper
and cut it out too, including the eyes. You now have the
front and back.
Glue tissue paper over the eyeholes on the backside of the
front cut out.
Glue the front and back together (make sure to line
up the
eyes) so the tissue paper is hidden inside.
Paper Plate Masks
Make a silly, scary mask using paper plates and cardboard egg cartons. Cut
eye holes in a large paper plate. Cut apart the cups of an egg carton and
arrange them on the plate to make a nose, beard, and bumps. When you have an
arrangement you like, use glue or masking tape to attach the cups in place.
Paint the mask with finger paints and add facial features. Let the paint
dry. Punch a hole in each side of the paper plate and string a piece of
elastic or string through each hole to go around the head.
Paper Plate Bat
Paint a small paper plate with black finger paint, and let it dry. Cut
triangle shapes from black construction paper, 3 for each wing and lay them
out so you can glue the two top corners to another triangle. Fasten the
wings to the back of the paper plate and draw a face with white correction
fluid or chalk. Punch a hole in the top to hang.
Paper Plate Masks
Materials Needed:
Paper Plates, Popsicle Sticks,
Yarn, or Rubber Bands, Glue or tape, Crayons,
Markers, or Paint, Scrap Paper, Fabric, Buttons.
Directions:
Cut out holes for eyes.
Decorate as desired. Use a popsicle stick as a "handle"
to hold up the mask,
or use yarn or rubber bands to tie it to the face.
Puzzle Pins (or tie slides)
You'll need: puzzle piece, pin 1" long (or 1/2" long piece of PCV pipe),
black fine tip, permanent marker, acrylic paints, glue. Choose an
appropriate piece of the puzzle. Base coat the backside of the piece (this
will become the front of the pin). With a pencil, draw the face onto the
piece (Dracula, witch, pumpkin, black cat, ghost, Frankenstein). Paint with
appropriate color. After paint has dried, use marker to outline your face
(do the line work). Glue pin (or pipe) to back of piece.
Wooden Pumpkins
You'll need: 8" of 3 1/4" X 4" landscaper timber (or 8' of 2"X6" rough
lumber), felt (paper) for leaves or silk leaves, green pipe cleaners, 1"
Dowel (cut to 2" lengths) glue gun, acrylic paints (orange, green, black)
WEEK 1: Have boys paint their pumpkins orange. (use sponge to dab paint on
makes a less messy area) Have them paint the stem green.
WEEK 2: Glue stem to top of pumpkin. Curl pipe cleaners around pencil to
form tendrils. Cut leaves from felt.
WEEK 3: Glue tendrils & leaves to top of pumpkin, paint on faces (or use
black fun foam to make faces and glue into place)
Pre-K Fun Theme Pages are
for educational reference only!
No copyright infringement is intended.
I do not claim any of these as my own ideas.
They are shared from friends and fellow group
members.
Thanks for sharing all your great ideas!
|