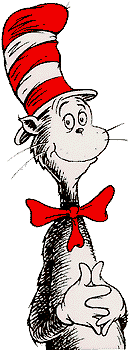
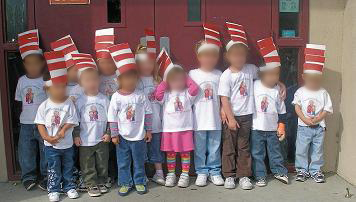
"Cat In the
Hat" HATS
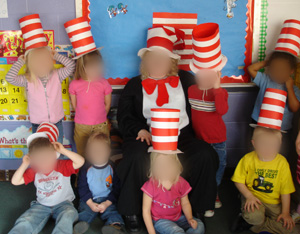
(Photo submitted by
Shell)
Make a Cat In the Hat
hat... click
here.
"Cat in the
Hat" HATS II
I just used a large
sheet of white paper, divided it into sections, and
had the children paint every other section. I took a 10" Chinet
plate and
cut out most of the center. Roll the painted paper in a cylinder
shape
with the top a little wider than the bottom. Staple it in place.
Cut
slits about every couple of inches and fold them up. Set the hat,
w/ends
up, on top of the plate. Staple the ends to the top of the plate.
Attach
a string on each side for tying. And viola you have The Cat In The
Hat.
The Cat in The
Hat Sentence Strip Hats
Cat in the Hat hats
are always fun. I'm going to use a white sentence
strip for the band. Measure around the child's head so you know
where to
staple it. Students will then cut stripes of white and red paper
and
glue them in a pattern to a hat shaped pattern that has been cut
out for
them. Have each student make two of these. Take the hat pattern
and
staple the brim of the hat to the sentence strip. One on the
front and
one on the back. Now staple the two hat patterns together at the
top so
it will stand up straight when on the child's head. Again, I'll
send
pictures once we have completed.
Cat In the Hat
Paper Plate Character
Have each child color the outer portion of a 9"
white paper plate using a black crayon and draw
a cat face in the center. Next, have them draw a tall hat on a
vertically positioned 9" x 10"
piece of white construction paper. After coloring red stripes on the
hat, cut the hat out and glue
to the paper plate cat's head. Then prepare two construction paper
ears and glue them in place.
Finally, glue two six-inch red crepe paper streamers to the cat...
one vertically and one horizontally... to resemble the cat's bow.
Cat In the Hat
Headbands
(Photo submitted by
Nanette)
White rectangle
construction paper stapled to white
headband, add red stripes with either paper/paint.
Fun Hats
Have the children
make a hat. You can use: a paper plate, old pizza box top, cut
out the center
or a heavy cardboard. I cut out the cardboard or plate or pizza box
top into different Shapes,
like rounded edges pointy edges.... Let the children decorate the hat any
way they want.
Use feather, silk flower, balloons, any items you may have in your room
that can be recycled.
Be creative. Give lots of glue and glitter. Wait to you see what they can
do. Than I ask the
the children to parade around the room asking" DO YOU LIKE MY HAT?"
You can have a birthday party the next day and wear your HATS to
the party
One Fish, Two
Fish Art
Paint blue tinted
corn syrup onto 3/4 of a paper plate or fish bowl shaped
construction paper, and glue paper fish and plants. It's messy,
but
the results are beautiful. After the syrup has set for about two
hours, cover them with plastic wrap to cut down on stickiness.
Yertle the
Turtle
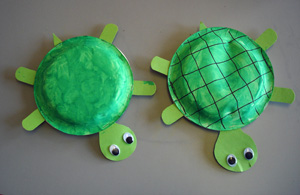
(Photo submitted by
Shell)
Turn 2 paper plates
upside down and paint green, let dry. Cut out front and back feet
and little tail from brown or green construction paper. Staple to the
inside of one paper
plate. Cut out head w/neck, then draw eyes and mouth or glue on
wiggly eyes.
Staple to paper plate. Staple the two insides of the paper plates
together.
Variation:
Poke a hole in the top of the bowl in the middle. Then insert a
piece of yarn
and tape to the inside of the bowl. Now those turtles can go for a
walk.
Create a Foot
Book
Each child gets to
dip their foot in paint then put a foot print on a piece of
paper.
Put together a book with everyone's foot (use lots of different
colors) - even the teachers
foot prints should be included. I trace my feet as the largest feet in
the classroom. I use
my feet as the books front and back covers. The children's
painted footprints go in the middle.
Foot Painting
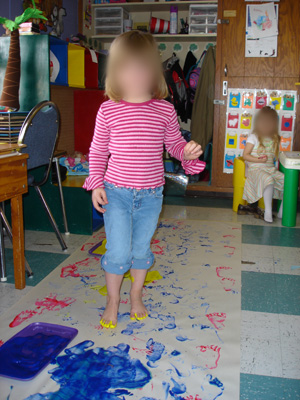
(Photo submitted by
Shell)
Set out a long piece
of bulletin board paper or butcher paper. Let the children take
turns dipping
their feet in paint (the color of their choice) and walk along the
paper to create their own footprints.