|
Apples Arts & Crafts Ideas
Worm In My Apple
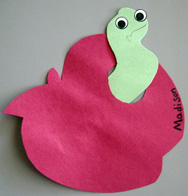
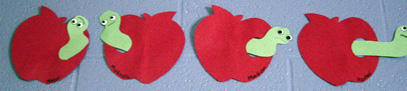
Photo submitted by Shell
Apple and Worm Cut outs.
Fingerprint Apples
Children can draw and color their own apple trees, then
add apples
by dipping a finger
in red paint and dabbing it onto his/her tree.
Attach precut green leaves to the top of each apple when the shapes have dried.
Johnny Appleseed Hats
Use large black construction paper
cut length wise. Measure and staple together to make the pot.
Then cut a brown handle and attach to the side. Put a red apple on the
front with the child's name on it.
Apple Mural
Cut out a large apple
shape from a large paper roll. Have the children do apple printing
on it.
Use a variety of sizes and shapes and colors (for example,
red, green, and yellow). Tack apple
print to wall and play a
variety of games with the mural. (eg. count the apple prints, find
the print that is the
largest/smallest, find the print that is the darkest/lightest ,do any of
the shapes look the same/different.
Dried Apple Wreath
Cut a wreath shape from cardboard.
Glue dried apple rings around the wreath overlapping
them. Gather
some dried flowers & leaves to fill in the wreath. Add a bow
at the top.
Apple Core Pencil Holder
Paper mache around a
toilet paper roll. Pipe cleaner stem. Green raffia leaf.
Stained Glass Apples
Cut out apples from construction paper,
then fold them in half and cut out a smaller
apple within each.
Give each
child one of these apple outlines. Have them put it down onto
a
piece of clear contact, sticky
side up. Next, let them fill in the
apple using scraps of tissue paper. When
filled in, place another
piece
of contact paper, sticky side down, on top of the apple. Press
to
seal, then cut around
outside and hang in the window.
Paper Trees
Rip brown paper (or
paper bags) to make a tree trunk on another piece of paper. Use
a
sponge to make green leaves around the top of the tree. Make red
fingerprint apples.
Apple Prints
Cut several apples in half, some vertically, some
horizontally. Children can dip the apple
halves
in paint (red, yellow, and green) and press
onto
paper to make prints. After they have made several
prints
have them dip one finger in black paint & add "seeds" by pressing it 5 times to
the center.
Variation:
Set out
corks and shallow containers filled with red tempera paint. Give each
child an apple tree shape cut out of construction paper. Let the children use
the round ends of the corks to print "apples" on their tree shapes. After the
paint has dried, use the prints for counting.
Apple Necklace
Put out bowls of
applesauce and cinnamon. You mix equal parts of applesauce to
equal parts
of cinnamon (1 cup to 1 cup). Mix thoroughly and make
a dough consistency. Have the children
roll it out, and use cookie
cutters to make shapes. Let dry on a cookie sheet for about 2 days
(maybe more) and turn over to dry. Make sure to make a hole at the
top with a straw so that when
it dries you can string yarn through it to hang. It makes a lovely scented
necklace or decoration.
Apple Shakers
Give each child two paper plates to
decorate as apples. Put the two
paper plates together, decorated
sides out, and
place
several apple seeds inside. Staple around the edges. Use
during
music time.
Bumpy Apple Sachets
Materials Needed:
fine-grain sandpaper, scissors, white paper, crayons, cinnamon oil
or vanilla, an iron, and an old towel.
Before class cut the sandpaper into
apple shapes (one for each child). Be sure each sandpaper
apple is at least 3" across. Set out crayons. Give each child a
sandpaper apple and let children
scribble-color the apples
with crayons. Encourage children to press hard while
coloring. As
children color their apples, heat the iron to
low. Be sure the iron is out of the children's reach.
When the apples are colored, hand each
child a sheet of white paper then help children fold the
paper in half. Demonstrate how to slide a sandpaper apple
between the fold. Place the folded
papers containing the
colored apples under a towel. Iron gently over the towel for
30 seconds. Make
sure preschoolers do not touch the iron! Let children unfold their papers to
reveal "bumpy" apple
pictures. Then invite children to put a drop or
two of scented oil on their sandpaper
apples to make them
smell good. *These scented sandpaper
apples
make great sachets for dresser drawers or the family car.
Painting with Crab Apples
Children will really enjoy
painting with crab apples that are inedible. Start by using all
five senses to
explore each part of the apple. Have the children
place an apple in a shallow amount of paint in a bowl.
Each child
picks up an apple by the stem and places it within a lid of a box
that is lined with paper. The
children manipulate the box so that
the apple rolls back and forth vertically and horizontally. Talk
about it's
spherical shape as it rolls. This is very similar to
marble painting but you are using an apple instead.
Apple Drawing
Give each child an apple. Show them
how to draw a simple picture of an apple. Invite each child to take
a
bite out of their apples and then show them how to draw another picture of the
apple with a bite missing.
Sponge Paint Apples
Draw a large tree on a bulletin board
covered with white butcher. Cut a sponge into round pieces
and attach a
clothespin to the back of each piece. Give each child a clothespin sponge
to
dip into red tempera paint and dab on the tree to look like apples.
Fingerpaint Apples
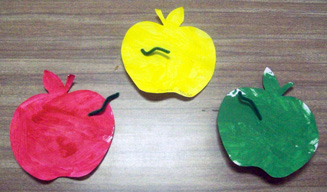
Photo submitted by Shell
Painted Apple cutouts with green pipe cleaner worms
Use red or green tempera mixed with starch to finger paint an apple shape.
Happy Birthday Johnny
Make a birthday card for Johnny Appleseed on his birthday.
Mosaic Apples
Glue scraps of red and green paper, fabric or tissue paper to an apple shape
Apple Collage
Have children create their own apple collage by using different
cut outs
of apples that they have drawn or traced and cut out.
What's Inside an Apple
Take two paper plate & paint the
outside red. Put the plates facing each other & punch two holes
near top & tie
with green yarn. Open "apple" and have kids glue a star- shape using real apple
seeds.
Cut out stem & leaf pieces & glue to the peek-a-boo apple.
Apple Tree
Lay butcher paper with a simple tree drawn on it on the floor. Using the wood blocks and
brown or black paint have the children print the tree. Have
them make green handprint leaves.
Have them cut out an apple shape, and print the apples using the sides of their fist dipped in paint.
Window Apples
Using red, yellow, and green crayons with the paper peeled
off have the children make crayon shavings
with a pencil sharpener or potato peeler. Turn
an iron on a warm setting. Put the apple shapes,
and the crayon shavings on the art table. Sprinkle crayon shavings on one side. Then lay the
apple
on a stack of newspapers, cover it with several pieces of newsprint, and iron the apple until
the shavings have melted.
Take the apple out from underneath the newsprint.
Coffee Filter Apple
Children paint coffee filters red, green, or yellow with water colors. Add a stem
and trim a little off the bottom of the filter to make it apple shaped.
Paper Plate Apples
Give each child a white paper apple, and finger
paints it red. When it's dry, add
green paper leaves and a brown stem, and glue real apple seeds to the center.
Print Apples
Set out corks and shallow containers filled
with red tempera paint. Give each child an
apple tree shape cut out of
construction paper. Let the children use the round
ends of the corks to
print "apples" on their tree shapes.
Apple Pie
Cut brown construction
paper circles
with a pinking shears. Let the children
shake apple pie spices and sugar on
it, then
mount it on a big doily to look
like an apple pie. Let the babies play with
dollops of
apple jelly.
Windsock
Use red,
green, and yellow apple cutouts or stickers (or sponges and paint) to make
an apple
pattern on a sheet of finger-paint paper. Add red, yellow, and green
streamers. Roll paper into
a tube and tape. Punch 4 holes in the top and thread with matching yarn.
Hang in the breeze.
Paper Plate Apples
You can make
paper plate apples a few different ways. Give a child a 9 inch paper plate.
Have them cut out the shape of a leaf from green paper (you can draw out
the leaf for
them or let them be creative) and this will be added to the apple last.
They can make the
apple red by simply coloring the whole plate red, paining the whole plate
red, sponge
painting the plate red for a textured look, or by tearing up pieces of red
construction
paper and gluing them on the plate for a unique textured 3-D type of look.
Don't forget
to add the leaf. You can also add a piece of brown paper for a stem.
Mosaic
Apples
Materials
Needed:
1 small paper plate per child
Small amounts of green and brown construction paper for leaves and stem
red, green and yellow construction paper for the apple.
Directions:
Give each child a small paper plate and some green and brown construction
paper,
also their choice of yellow, red or green construction paper for the color
of their apple.
Have them begin with the paper plate turned face side up. The
children tear small
pieces of their choice of construction paper and fill the plate with them.
When their
plate is filled, they dump out the paper strips, turn the plate over,
flatten it and glue
on the strips so that they cover the back of the plate. Then they tear two
leaves
and a brown steam and glue at the top to create an apple.
Stained Glass Apples
Cut a large
apple template from a file folder or tag board. Give each child a piece of waxed
paper larger than
your template. Give them red, yellow, green tissue paper to tear or cut
into squares. Put white glue slightly
thinned with water on the waxed paper and have the children cover the
waxed paper with the tissue squares.
When finished have them trace the apple template onto green, red, or
yellow construction paper. They cut
around the template, then you will have to do this next part. Leaving
about a 1" frame, cut out the center of
the apple. Have the children trace the template onto the waxed paper
tissue paper and cut out, then glue
the frame onto the apples. These look really great hanging up, especially
where sun can shine through them.
What's Inside An Apple?
Use two paper
plates and have the child color the outside red, yellow or green.
Put the two plates together facing each other so the outside is showing Punch
two holes in one side and tie together with yarn. Open Apple up and glue
apple seeds in
the middle of the plate. Cut out stem and green leaf cutouts and glue them
to your peek-a-boo apple.
Apple
Time
Materials
Needed:
red,
green, and brown construction paper
pattern of an apple
scissors and paste
Directions:
Have children trace and cut out apple pattern. Trace and cut out their own
hand on green construction
paper and cut out. Use the hand cut out as the leaf on the apple, then cut
out brown stem.
Classroom Apple
Tree
Use a
large piece of bulletin board paper. Draw a tree with branches.
Children can use an apple shaped sponge or use paint and a brush to put
apples on the tree. When paint is dry write the children's names on their
apples. Hang apple tree art in the classroom or on a bulletin board.
Fingerpaint
Let the
children fingerpaint using red, green, and yellow paint.
Easel Paint with
Yellow Paint
Different
shades of yellow can be obtained by adding small amounts of white paint
or lighter shades or orange paint for darker shades. Let the children help
make
these different shades and discuss which is lighter and which is darker.
Paper Plate Apples
We made apples out of paper
plates. The children color the backs of two paper plates
red and add stems (brown or black) then staple one side together so one
side can still
open then we glued real apple seeds inside. They like to open and close
them!!
Apple
Materials Needed:
red strips of paper about 1 1/2 " wide
green strip about 3" long and 1" wide
brown strip about 2" long and 1" wide
Directions:
Take the red strip of paper and bend the ends together. Should
resemble and apple.
Bend the green strip and add to the apple. Do not fold paper then stick
the brown strip in the top. Stick a stapler inside the apple and staple.
Cinnamon
Apple
I don't know if this would
work, but it is a thought I had. Cut an apple shape out of sand
paper.
Color the sand paper green or red with crayon. Then rub a cinnamon stick
over the paper to make it
"smelly". I know the smelly part will work, I am just not sure of how to
get it to be a color.
Apple
Core
Draw an apple shape - a
little more oval through the sides than up and down on green
or red construction paper. Cut the apple in half through the sides, not
the up and down.
Cut out a white core. This is shaped like a long rectangle with the ends
flared out on each
side. Glue this between the two apple pieces. Either draw on
or sponge paint on black seeds in the middle of the core.
Apple
Handprint Gift
Materials Needed:
red, green or yellow paint, (brown & green paint for stem),
paint brush, white construction paper, construction paper for
the frame
(I usually let the children choose this color),
marker, glue, sequins (red, yellow & green), paint glue pens (3D
type) and a picture of each child
Directions:
After each child has chosen the color construction paper they
wish for their frame, I cut these out leaving
a 1 to 1 1/2 in. border. (Older children may cut the frames out but too
difficult for younger ones) Each child
then glues their frame onto the white sheet of construction paper. Then
have them choose the color apple
they wish to have-yellow, red, or green and have them paint only the palm
of their hand and press it on the
right side. Have them wash their hands and paint their little finger brown
and press it on the apple for the
stem. Then paint one fingertip green for the leaf. After washing their hands,
have them glue their picture on
the left. When they have decided who they wish to give this gift to, write, "You are
the apple of my eye"
between the apple and picture, then write the child's name and date near
the bottom
Apple
Painting
Let the children paint using
an apple that has been sliced in half.
Hand and
Arm Print Tree
Paint the child's hand and arm brown,
then put on large sheet of paper. Next
finger paint green leaves and red apples on the top to make an apple tree.
Karo Syrup Apples
Mix Karo Syrup with red food coloring or
paint. Paint shiny red apples.
Homemade Red
Finger-paint
Add small amounts of water to soap
flakes until the desired consistency is
obtained. Add red food coloring. Use on finger-paint paper or a tabletop.
Play Dough Apples
Let children make apples out of red play
dough, put twigs in and let dry.
If provider prefers, use a neutral color and then paint the apples.
Monoprint Apples
Finger paint with red finger paint
directly on the table surface. With your finger, draw
an apple, add a stem and leaf. Place construction paper face down on paint
and rub gently.
Peel off carefully. Let dry, cut out, add smile, eyes, nose with black
marker. Color stem and leaf.
Sandpaper Apples
Draw an apple on the rough side of some
sandpaper, draw the outline of an apple and fill
in with a red crayon (being sure to press hard as you color). Draw on a
leaf and stem. Place
a piece of white paper on the table and put the sandpaper on top of it,
drawing side down. Iron with
a warm iron (making sure the children are at a safe distance) and the
print will transfer to the white paper.
Paper Bag Apple
Fill a paper bag with leaves and tape
closed. Paint the bag red and add a stem and a leaf.
Apple Shakers
Take two paper
plates, and have the children color or paint them, red on one
side and yellow on the other, staple together around the edges, leave an
opening big enough to insert some beans, and fasten shut.
Torn Apples
Have a class supply of apple shapes and
have children tear pieces of construction
paper and glue them to the apple shape. Paint the child’s hand green and
stamp it
onto the paper as a leaf. Add the following poem, date it, and have child
sign it:
This little
apple that you see here
Was made just for you my preschool year.
You'll never see one like it in all this great land,
Because for a leaf I used my own little hand!
Apple Pigs
Read the story Apple Pigs by Ruth Orback.
Make an Apple Pig using 2 red apples (one small, one large; 6 toothpicks,
6 silver ball cake decorations, 1 slice lemon, 1 pipe cleaner, scissors,
apple corer of knife.
Hold the large apple on it's side and
insert four toothpicks for legs. Cut the small apple in
half and attach one half to the body with 5 toothpicks (with cut side
facing out to make the face).
Rub the cut side with the lemon slice to keep it from turning brown. Cut a
cylindrical shape from
the remaining apple piece for the snout. Attach with toothpicks. Make
holes for nostrils. Make two
small holes for eyes and insert silver balls. Make slits on top of head
and put in leaves to make ears.
Johnny Appleseed
Headbands
Staple two 6" x 12' black construction
-paper strips end to end. Glue an apple cutout to the center of the
band. Staple the band to fit a child's head. Round one end of a 9" x 3"
construction-paper rectangle to
resemble a pot handle. Use a round or apple-shaped hole punch to punch a
hole in the rounded end of the
handle. Fold the opposite end of the handle, creating a tab for gluing.
Glue the handle to the headband.
Apple Tree
Cut a tree trunk shape out of brown
construction paper and glue on to a large sheet
of white construction paper. Paint tree leaves above tree trunk with green
paint (dot paint
works well for this project). Cut circles out of red construction paper
for apples and glue on tree.
Crayon Melt Apple
Frames
Grate green crayon ahead of time. Tear
out 1 piece of wax paper approximately
9" x 9" per child. Fold wax paper in half. Have child sprinkle green
crayon
shavings onto 1/2 of the wax paper. Fold wax paper in half. The teacher
will
iron wax paper to melt crayon. Next have the child glue wax paper to back
of
apple frame. Glue a back to the wax paper for form the back of the frame.
**The frames that I use are what is left over from my die cut machine after I
have cut out several apples for another project. These frames could also
be made by tracing an
apple pattern onto construction paper squares and then cutting the apple
out of the middle.
Apple Head Grannies
Peel the apple and leave the stem at the
top. Tie a string to the stem.
Hang in a dry area like a window for a couple of weeks. The apples
will shrink and wrinkle up like little old ladies. You can make a body
by putting the heads on small bottles (shampoo, dish soap
etc.) Make a dress out of a piece of fabric. You can even use a small paper clip
to make
glasses. If you don't want the apples to be that brown then dip them in
lemon juice first.
Barney Tree
Roll up crinkled old butcher paper from
the floor up to 3/4 of the wall.
Take branches and extend it up the wall and the ceiling, make handprints
for leaves and start out with green leaves. Use palm print apples. The
next
month, green starts coming down and a few of the yellow and orange
go up.
By November all green is gone and brown appears. By December you should
have brown only. In January there are no leaves and the tree comes down.
To make the apples for it, paint only the palm of the child's hand red,
cut out and post.
Hand Print Trees
Green
watercolor pencils or crayons
White construction paper
Cups of clean water
Paintbrushes
Brown paint
Red paint
Use
pencils or crayons to make treetops by scribbling some lines and circles on the
construction
paper, covering an area approximately the size of a saucer. Once this is
done, give the children cups
of clean water and paintbrushes. Tell them to paint with water over the
scribbled section. This will make
the scribbling spread to fill in the white spaces so it looks like the
leaves on trees. Let the pictures dry.
Invite
one child at a time to come to your table. Spread some brown paint onto the
child's hand and wrist.
Ask the child to hold his fingers apart. Guide his hand to make a print
halfway on and halfway below the
painted treetop. The print from the fingers should look like the branches
of the tree,
and the wrist print should look like the tree's trunk Set out red paint in
a shallow container.
Show them how to dip the pointer finger into the paint and make a print
with it.
Apple Trees All Year
Long
Fold a 12x18
sheet of white construction paper into four sections.
For each section, tear a paper trunk from brown paper, and glue on.
Tear thin branches -- or draw them with brown crayon or marker.
Label the four sections at the bottom, in this order: spring, summer,
fall, and winter. For spring, attach 1 inch squares of green tissue paper,
Scrunched over the tip of a pencil and dipped in glue. For summer, tear
green construction paper into small pieces and glue on in a mosaic
pattern.
Top with tiny paper punch apples. For fall, attach fall colored square
of tissue paper. For winter, leave the branches bare.
Apple & Worm Crayon
Rub
Make a stencil for apples and worms and let the student
make a rubbing
over the stencil with crayons to make the magic picture appear.
Letter Y Apple Tree
Teach the children how to make a large Y on the blue paper
representing a tree
trunk and branches and then they sponge paint green leaves or tear green
construction paper leaves and then they index finger print red apples on
the tree.
Hanging Apple
Balloons
Small water balloons
Red Tissue paper
Green and Brown Construction paper
String
Liquid starch
Paintbrush
Scissors
Blow up the balloons to about half their size. Cut the red tissue paper into
small strips. Then tie a string
to the knot in the balloon. Now place a strip over the balloon and paint
it with the liquid starch. Keep doing
this till the balloon has a few layers on it. Then hang it to dry at least
overnight, maybe more. Now cut out a
stem from brown paper, and a Leaf from the green. When the balloon is dray
take a pin and stick it through
the tissue paper and pop the balloon. Now pull the balloon parts out of
the tissue apple. You will now need
to re-glue the string inside the apple. Once that dries you can glue on
the stem and the leaf, and hang.
Tissue Paper Apples
Inflate
balloons to the size of an apple. Cut red tissue paper into strips (about 1" by
4").
Cover the balloon with a light coat of Vaseline. Dip strips of tissue
paper into diluted glue
but don't let them soak. Stick them on balloons. These take about 24 hours
to dry.
When they are dry, you can pop the balloon with a pin and remove the
balloon.
Painting with Crab Apples
Many children will really enjoy painting
with crab apples that are inedible.
Start by using all five senses to explore each part of the apple. Have the
children place an
apple in a shallow amount of paint in a bowl. Each child picks up an
apple by the stem
and places it within a lid of a box that is lined with paper. The
children manipulate the
box so that the apples roll back and forth vertically and horizontally.
Talk about its spherical
shape as it rolls. This is very similar to marble painting but you are
using an apple instead.
Apple Hand Prints
Paint the palm of the hand, red. Press
the palm down on construction paper. Paint the thumb
of their hand, green. Press their thumb down to make the stem/ leaf of
the bitten apple shape.
Apple Picking Bag
Fabric bag
Newspaper
Fabric paint- red, green & brown
Paint brush
Apple
Fold over newspaper and insert it into the fabric bag, laying it flat so the
paint will not seep through.
With a brush, use brown paint to fashion a tree trunk and let dry. Then use a
horizontally
cut apple to make leaves by brushing a thin layer of green fabric paint
onto the apple and
pressing it around the top of the trunk. Repeat several times (make sure
to look for star in the print!)
After the green paint dries; cut an apple in half vertically. Pick the
side that still
has the stem and brush with red fabric paint. Then “hang” juicy apples on
the tree.
Apple Spin Art
Spin a paper
plate on the record player while the child holds different
colored markers on for a great look. Then cut small wave on the top and
bottom
for an apple look, then they pasted green leaves and brown stem in the
middle!
Family Apple Trees
Cut a sponge to look like a tree trunk.
Cut apple shapes out of sponge. On white paper, place the tree trunk
sponge (dipped in brown paint) on paper. Use fingers to press on leaves
with green paint. Sponge red apples
onto the paper for family members. After it dries, family member names may
be printed near apples with
fine tip black marker. These are gorgeous especially when packed with
colored paper. (Try dark blue.)
Apple Trees-Blow Paint
Make a blob of
black or brown paint on white construction paper. Blow through a straw to
make the paint spread out to form branches of a tree. When the paint is
dry, use small pieces
of red tissue paper made into little balls to glue on the branches to make
apples on the tree.
Wormy Apple Plate
The children paint a small paper plate
an apple color (red, yellow, green).
Then, when it is dry, the teacher punches holes around the edges and adds
stems. The children take brown yarn and weave it in and out of the
holes.
Bumpy Apple Sachets
Fine- grain sandpaper
Scissors
White paper
Crayons
Cinnamon oil or vanilla
An iron
Old towel
Before class cut out the sandpaper into apple shapes (one for each child) be
sure each sandpaper
apple is at least 3” across. Set out crayons and give each child a
sandpaper apple to color.
Encourage the children to press hard while coloring. As children color their
apples, heat the
iron to low. Be sure the iron is out of the children’s reach. When the
apples are colored, hand
each child a sheet of white paper, and then help the children to fold the
paper in half. Demonstrate
how to slide a sandpaper apple between the fold. Place the folded papers
contain the colored
apples under a towel. Iron gently over the towel for 30 seconds. Make
sure children to do not
touch the iron. Let the children unfold their papers to reveal “bumpy”
apple pictures. Then invite
children to put a drop or two of scented oil on their sand paper apples to
make them smell good.
*These scented sandpaper apples make great sachets for dresser drawers or family
car.
Tooth Brush Painted Apples
Red paint
Toothbrushes
White construction paper cut into large apple shapes (approx. 10 x 10)
Green construction paper cut into stems
Have the kids paint their apples with the toothbrushes.
They will glue the stem on the apple where they think it goes
Shaving Cream Apples
Cut large apple shapes out of butcher
paper and spray on puffs of shaving cream.
Then sprinkle on powdered red tempera and let the children Fingerprint on
their apple shapes.
When the shapes have dried, attach green construction paper leaves to the top of
each apple
Apple Printing
Cut the apple
in half to reveal the star of seeds (cut the apple the night before and allow
to dry out a little bit for best results), paint the apple (using tempera
paint and a paper towel in a plate)
and print. Print the following poem on the paper:
In every apple near and far,
There is a special little star!
Ten Apples On Top
Take photos of the kids a
few days before. Get prints back for this activity. Head shots are
really
the best, but you can do the full child too. Read the story by Dr Seuss to
the children. Have them
glue their photo on to a construction paper, give each child 10 apple
stickers to place on top of
their pictures head. I also use a plastic apple and let each child try to
hold it on their head.
Pre-K Fun Theme Pages are
for educational reference only!
No copyright infringement is intended.
I do not claim any of these as my own ideas.
They are shared from friends and fellow group
members.
Thanks for sharing all your great ideas!
|